
Dry River Bed Landscaping: Drainage That Looks Deliberate
A dry creek bed solves real runoff while reading as a design feature. Stone grading, a sinuous line and buried fabric are what separate the two.
 By
On this page
A dry creek bed does two jobs at once: it manages real runoff and it looks like it belongs there. Most fail at the second, and the reasons are specific and fixable.
Watch the rain first
The single most useful hour of this project happens before any digging.
Go outside during heavy rain and watch. Where does water enter the garden, what route does it take, where does it pool, where is it cutting a channel into the lawn or washing mulch out of a bed?
A dry creek bed built along that observed route works. One built where the plan looked best on paper becomes a stone ornament that water ignores.
Two things a creek bed cannot do
It cannot move water uphill, and it cannot fix a high water table. If the garden is waterlogged because groundwater sits near the surface, a surface channel does nothing — that is a drainage contractor’s problem.
Also check where you are sending it. Discharging concentrated runoff onto a neighbour’s land is a dispute, and in some places a legal one.
Sizing
| Catchment | Width | Depth |
|---|---|---|
| Small bed or patio runoff | 45–60 cm | 10–15 cm |
| Typical domestic garden | 60–120 cm | 15–30 cm |
| Large roof + drive runoff | 1.2–1.8 m | 30–45 cm |
| Steep slope, fast flow | Wider, with check dams | Deeper at the bends |
The profile is a shallow dish — lowest at the centre, rising gently to the sides. A steep-sided trench looks engineered, erodes at the edges and is more dangerous to step into.
Stone, which is where the look is won or lost
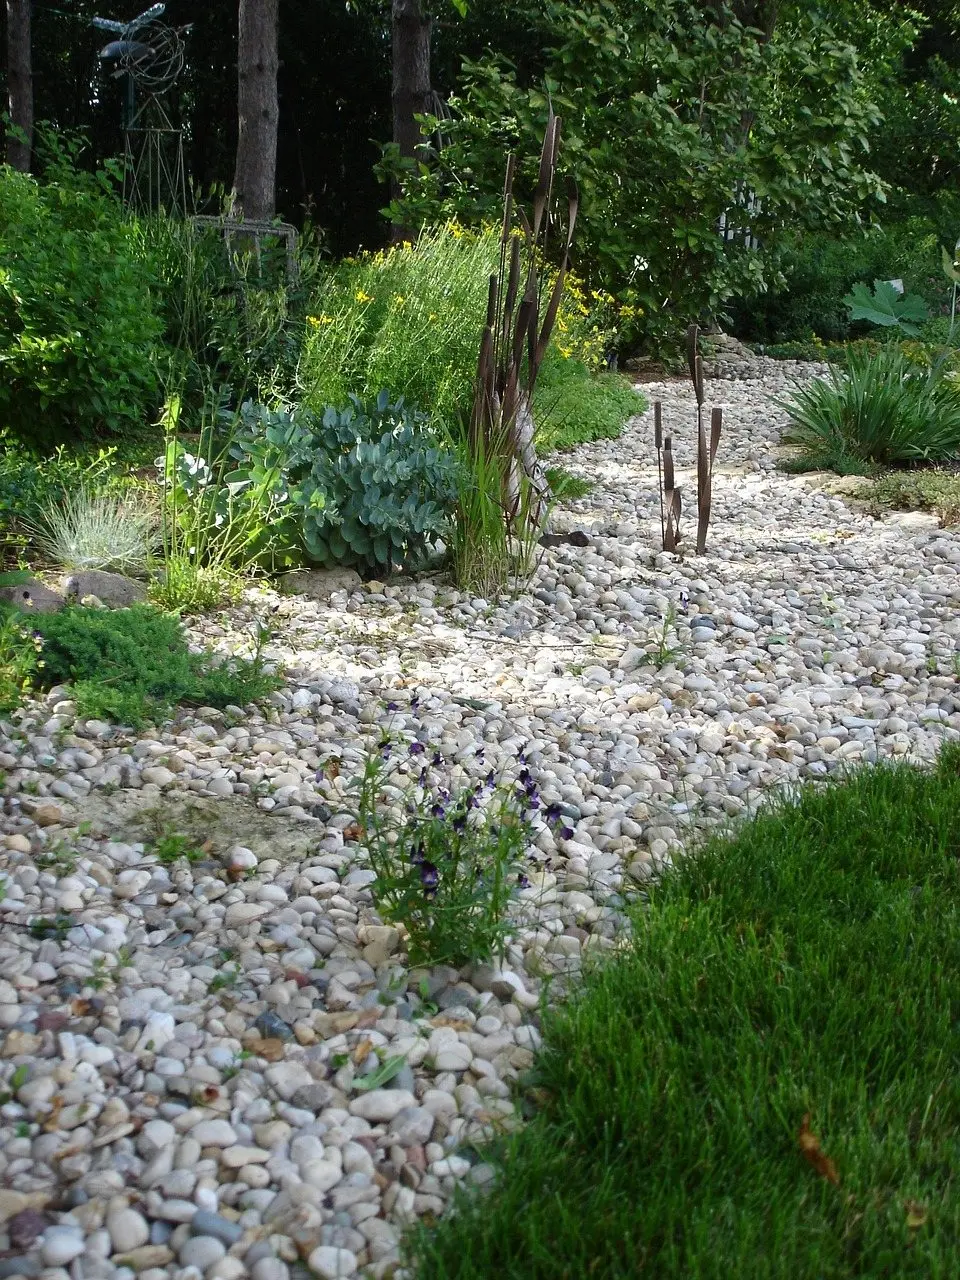
Real watercourses sort stone by flow speed. Copying that pattern is most of the work:
- Boulders — anchor the outside of bends, where flow is fastest. Half-buried
- Cobbles, 100–200 mm — line the channel sides
- Stone, 50–100 mm — the bed itself
- Pea gravel — fills between, and settles into gaps naturally
- A few large flat stones — stepping points, or a crossing
Buy a mixture. A bed made of one stone size is immediately recognisable as artificial, and no amount of curving rescues it.
Half-bury the big stones
This is the detail that separates a convincing bed from a pile of rock. A boulder sitting on the surface reads as something placed. The same boulder buried to a third or half its height reads as something the ground has always contained.
It also stops them rolling when water moves.
Making the line convincing
- Curve it. Water meanders; straight channels look like drains
- Vary the width — wider at bends, narrower on straights
- Vary the depth slightly along its length
- No visible edge. Let stone and planting blur the boundary
- Plant the margins so foliage spills over — grasses, sedges, thyme, creeping plants
- Hide the start and end, which is where artificial beds most often give themselves away
Where it should finish
Water has to go somewhere, and this is the step most often left unplanned:
- A rain garden — a planted depression that holds and infiltrates runoff. The best outcome
- A dry well or soakaway, if infiltration is slow
- An existing drainage point, where permitted
- A wider spreading area where flow slows and soaks away
- Never onto a neighbour’s property, a foundation, or a septic field
Maintenance
Modest, but not zero:
- Clear leaves each autumn — a leaf-packed bed stops functioning
- Pull weeds early; fabric helps but is not absolute
- Reset stones that have moved after heavy flow, particularly at bends
- Top up gravel every few years as it works down
- Watch it in a storm occasionally. If it overflows in the same spot each time, that section needs widening
A bed that has been through a few winters and had its edges planted looks considerably better than a new one. That is worth knowing on the day you finish it and it looks a bit raw.
Step by step
- Time
- P2D
- Cost
- 400
- You need
- Mixed river stone — cobbles, 50–100 mm stone, pea gravel, Several large boulders, Landscape fabric, Native plants for the margins
- Tools
- Spade and mattock, Wheelbarrow, Spirit level and string line, Marking paint or a hose
Watch the garden in heavy rain
Note where water enters, the route it takes, where it pools and where it is cutting a channel. Build along that observed line rather than a planned one.
Mark the course with a hose or paint
Lay a hose on the ground and adjust it until the curve looks natural, then mark it. Meander the line and vary the width — wider at bends, narrower on the straights.
Excavate a shallow dish
Dig 15 to 30 cm deep at the centre for a typical garden, rising gently to the sides, roughly twice as wide as it is deep. Keep the profile dished rather than trenched.
Check the fall along its length
Use a string line and level to confirm the bed falls continuously toward the outfall. A flat section becomes a puddle and a reverse fall becomes a pond.
Lay permeable landscape fabric
Pin it down with generous overlaps so weeds cannot grow through and stone cannot work down into the soil. Never use sheet plastic, which stops water reaching the ground.
Set the boulders first
Place the largest stones on the outside of bends, buried to a third or half their height so they read as geology rather than decoration.
Grade the stone from edge to centre
Cobbles of 100 to 200 mm along the sides, 50 to 100 mm stone through the bed, pea gravel filling between. A single stone size is what makes a bed look artificial.
Plant the margins
Grasses, sedges, thyme and low spreading plants along the edges so foliage spills over and hides the transition between bed and garden.
Plan where the water ends up
Finish at a rain garden, a soakaway or a permitted drainage point, never against a foundation, a septic field or a neighbour's boundary.
Common questions
Does a dry creek bed actually help with drainage?
How deep and wide should a dry creek bed be?
What size rocks do you use in a dry creek bed?
Should you put landscape fabric under a dry creek bed?
How do you make a dry creek bed look natural?
Backyard Weekly
Know what to plant, week by week
Join the weekly email for seasonal jobs, fixes for what is going wrong, and gear worth buying.
Not ready to subscribe? The planting calendar is free and needs no email.
By subscribing you agree to our privacy policy. Grow In Backyard will never sell your address.
Keep reading

How to Level a Lawn by Hand: Topdressing Without Machinery
Shallow dips fill with topdressing half an inch at a time. Anything deeper needs the turf lifted. The mistake is burying grass in one go.
What Is Perlite Made Of? Volcanic Glass, Popped Like Corn
Perlite is volcanic glass heated to 900°C until its trapped water flashes to steam and expands it. That is why it is white, light and permanent.

How to Grow Thyme: The Hardest Herb to Kill, If It Drains
Thyme wants gravel, sun and neglect. It survives drought and frost easily and dies in wet clay — which is the only real decision you have to make.
Front Yard Landscaping Ideas That Last Past Year Three
Most front yard makeovers look best the week they are finished. These nine ideas are chosen for what they look like after three seasons of real maintenance.